Jetpacks!

Alright, here’s the last of the reviews: Jetpacks

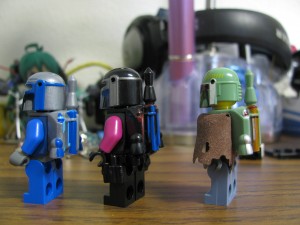
To be blunt, I feel these stand out the most out of this new release. Arealight’s jet pack design was already amazing, adding to them is just like icing on the cake. I was really excited about these when I was first told he’d be producing them and even more so when he sent me one of the original runs that didn’t turn out just right.

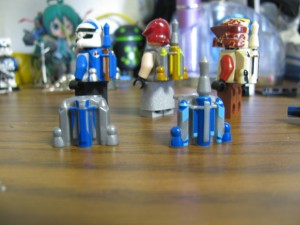
The one on the left was the original run, the one on right is the final version of the Jango Fett Pack.

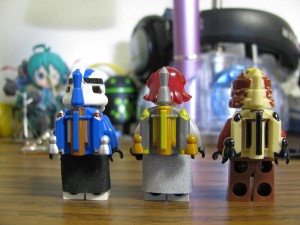
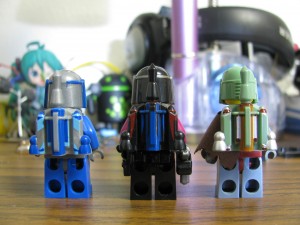
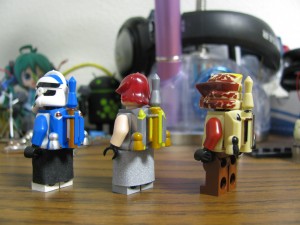
Left To Right: Boba Jetpack II / Isabet Jetpack / Mij Jetpack / Jango Jetpack / Vizla Jetpack / Boba Jetpack I

Arealight released 6 jet packs. Each one comes with the rocket accessory unlike their unprinted versions which include a warhead. Warheads and rockets are both sold separately.

I find the rocket goes better with the jetpacks anyways.

I’d rather not bore you with describing each on it’s own since they all have very similar print designs, so instead I feel it’s best to just let the pictures speak for themselves in regards to that. Each of them is colored specifically toward a character and Arealight did a great job of matching those colors.  I personally felt would have improved them would have been having the print on the boosters go all the way around, but the printer’s ability to print on that type of surface is pretty limited. Regardless, the printing on all of these are extremely clear and crisp. I can easily suggest getting any of these to anyone even if you aren’t that big of a Star Wars fan. Even though each design caters to a different character, the variety still allows you to make your own custom figure in the star wars universe or outside of it.

Small side note: The two Boba Fett jetpacks have the same print on different colored jetpacks (Sand Green and Blue).

Being completely honest here: It’s hard for me to recommend one over the other, so if you do intend on picking just one or two up: go with the color scheme you enjoy the most. You really can’t go wrong with any of them and they are definitely a step up from the normal Lego jetpacks which were just a wee bit too small.

As a closing note to this:

In regards to Wave 3 itself, I personally see it as a stepping stone for future print designs. Arealight printed onto two items he’s never printed on before: the AT-RT Helmet and the Jetpack. Both of these items have odd shapes as well, which in turn make the printing process harder than it already is with the normal helmets. While I can’t exactly say what is planned for the future I can easily tell you that more great print designs are definitely in store as well as a few other fun things.

I hope you enjoyed these and I hope they help you in your purchases.

-Apples

New ARF Helmet Prints

Alright, so today I’ll be reviewing the ARF trooper helmets.

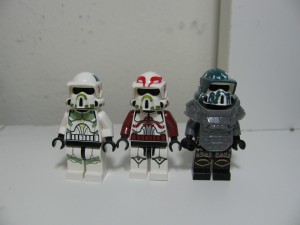
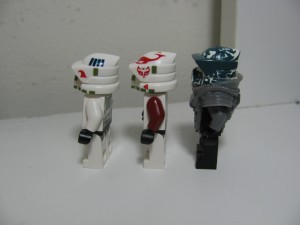
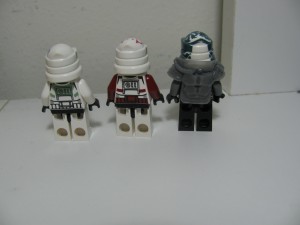
How I put the figures together: ARF Trooper: Body from the new Lego Star Wars Clone Battle pack / Rancor Trooper: Commander Fox torso with custom print legs from bricklink / Camo ARF  trooper consists of a KZ Body armor from Hazel Fantasy and the body from the new Lego Kingdoms sets.

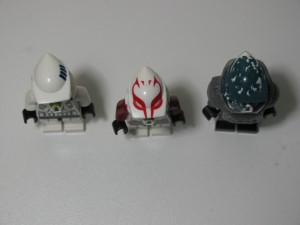
From left to right: Regular ARF Trooper Helmet, Rancor ARF Trooper, Camouflage ARF Trooper

Each of these presents a good amount of detail; not to mention Arealight did do a pretty good job on matching the reference photos as usual. The best starting place would probably be the typical ARF Trooper Helmet.

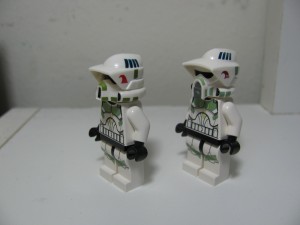
The helmet with this same design was also produced by Lego, but to be honest I do prefer Arealight’s version better as it just seems more visually appealing to me personally. And since I mentioned it, here is a comparison between Arealight’s ARF Trooper helmet and Lego’s helmet.

As you can see, Lego has a bit crisper printing on the stripes at the top of the helmet. I’m not sure if it’s just my copy of the helmet or if it’s on all of them, but the stripes on the top are a bit blurred. The color for the blocks of color on the front of the Lego helmet match Lego’s sand green (correct me if I’m wrong) while I’m not really sure what the Lego color equivalent would be for the Arealight helmet’s markings. As for the logo on the “sun visor”, Arealight left out some of the small small details there that Lego was able to recreate. Personally, I think it would have looked better if Arealight could have gotten the detail in or if he had altered the logo a bit.  Regarding the shape itself, I personally like the Arealight helmet because it’s a bit more simplistic and surprisingly fits in with Lego figures a bit better than Lego’s version. The fact you can change the visor color by simply changing the head is just an added bonus.

Moving onto the Rancor trooper: [Middle]

Arealight did a fantastic job with this helmet, the detailing matches perfectly to reference and has a great amount of detailing. There really isn’t much to stay about this, the print itself continues all over the helmet essentially.

Arealight had even included a detailed print of the emblem on both sides of the helmet.

Alright so lastly we have the Camouflage ARF trooper helmet. [Far right on all pictures]

At first glance the helmet’s print job doesn’t seem as good as the other two because it’s a design that is suppose to go all the way around the helmet, but it doesn’t.

Beyond that, the design itself is pretty nice. I’m a bit disappointed though, the color of the print currently does not seem to match any sort of Lego parts that are currently out. The closest color to it that I’ve seen is the dark bluish gray. Also the underside of the visor is still a plain white color, so it limits your photography a bit if you want to take a picture of it without showing that white underside.  All in all, I feel as if this was a helmet that was sort of shafted by the printer’s capabilities.

To wrap things  up:
I would say that the ARF troopers that came out this wave were alright, not as good as some of the other printed helmets. But! If you do plan on getting one of the three, I would suggest getting the Rancor trooper helmet as you will definitely be getting one of the better printed helmets out there. As always though, the best thing to do is to pick the one you would like the best. I’m just here to help you decide ;).

-Apples

Check back for more reviews and possibly a few “how to”s after I finish these reviews!

Not usually my job but…

Good day everyone :).
When I joined up Arealight as a spokes person one of the tasks I was given was reviewing products. To be completely honest, I’ve never done this before so this will be the first review I ever do but definitely not the last.

The way this will work is that I will have several items of a single type in one photo.  And I will include single photos as necessary. We all know slow loading times are lame, so I want to keep those loading times as low as possible. I also apologize for the photos, my room is currently a mess as I still haven’t gotten around to making room for a  photo space so I’ve been making due with a little area of my desk.

So, I suppose the best starting point would be the airborne helmets.
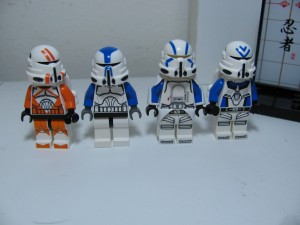
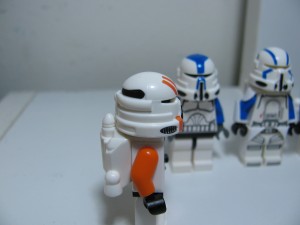
So for about $5.00 USD, you can purchase one of these four helmets. The price itself is actually pretty decent when you take into account that the helmets themselves retail for $2.50 and most retailers who will do printing, charge a lot more for the printing on flat surfaces. These figures consist of Brickforge Vambraces, MMCB Waistcape and Pauldrons, Lego Torsos [Clone trooper torso / Snow Trooper Torso/ ExoForce Torso] and Legs [Series 1 Astronaut / Clone Trooper Legs].

From left to right:
Utapau Airborne trooper helmet, a 501st Airborne helmet, Commander Keller Helmet, an Airborne sharpshooter helmet.

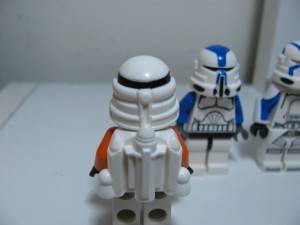
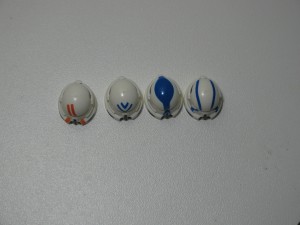
Over all they are all pretty nice helmets. Here is a rear view of the helmets:
Each of them look the same on the back and only have the black stripe on the back except for the 501st airborne helmet, which has it’s design continue from the front to the back. The Arealight Jetpack is a tight fit and you can only use the warhead without any real problems with moving the helmet. The only thing is that the helmet itself locks into place if it’s put in a straight forward position.

Here is a side view of the Utapau helmet. One of the two problems I do have with the helmets is the fact that the printing on the stripe on the back goes out of the indention on the helmet, but this is easily fixed with a bit of brasso and paint.  The other problem has to do with the vents on the lower part of the helmet. As you can see, there are some white areas showig out of the black, but other wise these are great helmets.

Here’s an overhead shot, as you can see the pattern on the 501st and Keller Helmets go from front to back.

So to finalize:
Utapau Helmet: This helmet is actually is quite accurate from what I can tell and matches the Lego orange quite well.

501st Helmet    : This one has a single production error on the front of the helmet above the visor, there seems to be what looks like a small chip on the very front of the design. However, Arealight did do a good job of matching the reference picture. The helmet I received of this one is a bit less defined than the rest on the edge of the design in the back.

Keller Helmet     : You really can’t go too wrong with this one. It matches the reference quite well and I personally love the cleanness of the design itself and how it fits so well on the helmet.

Airborne Sniper: Arealight, once again, did a good job of matching the reference for this helmet. The sizing on the design is quite nice in relation to the helmet size.

Overall, I’d have to say that these are pretty good products. The printing in general is pretty crisp and clean and Arealight did do a very good job in matching the reference pictures for these products. The only real problem I found was the line in the back going out of the indention that it seems to be made to fit into. If you’re trying to decide which ones to get out of these (due to lack of funds or what not), I would personally suggest the Keller Helmet mainly for the reason that the design on the helmet itself is very clean and works quite well on this helmet honestly.

Thank you for your time and please check back for future reviews and possible “How-To”s.